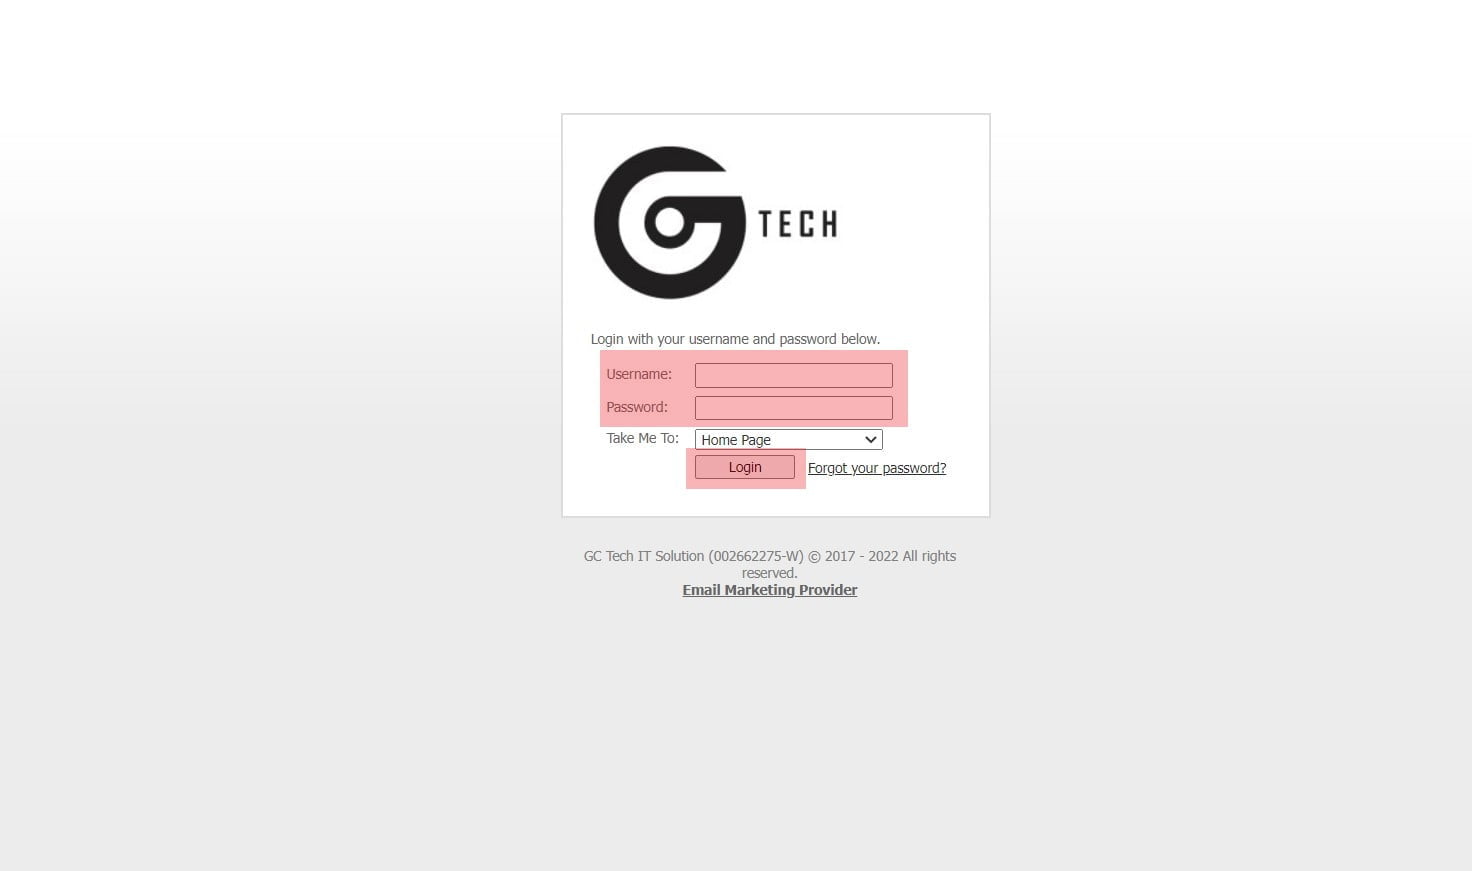
How to send out Email Newsletter
![how-to-use-gc-emailmarketing-2](https://www.gctech.my/wp-content/uploads/2022/06/how-to-use-gc-emailmarketing-2.jpg)
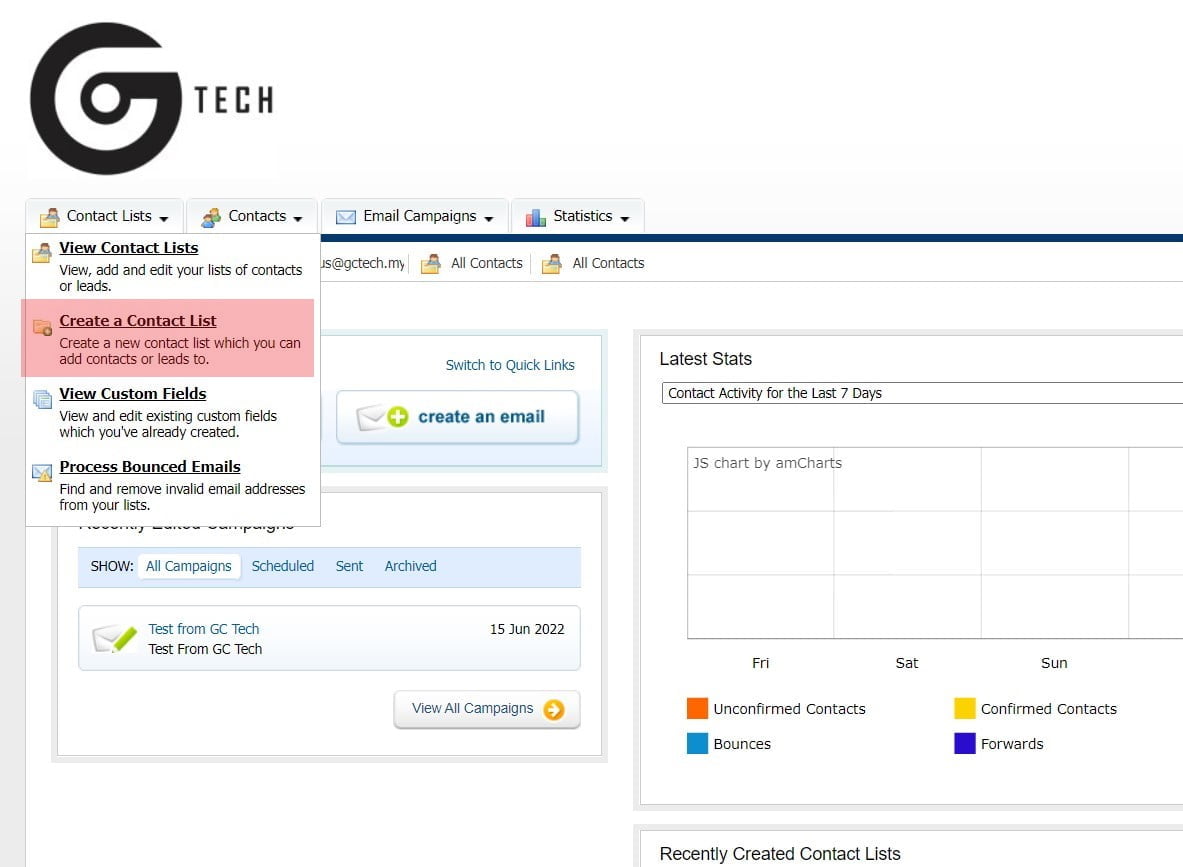
2. Click on Contact Lists and “Create a Contact List”
![how-to-use-gc-emailmarketing-3](https://www.gctech.my/wp-content/uploads/2022/06/how-to-use-gc-emailmarketing-3.jpg)
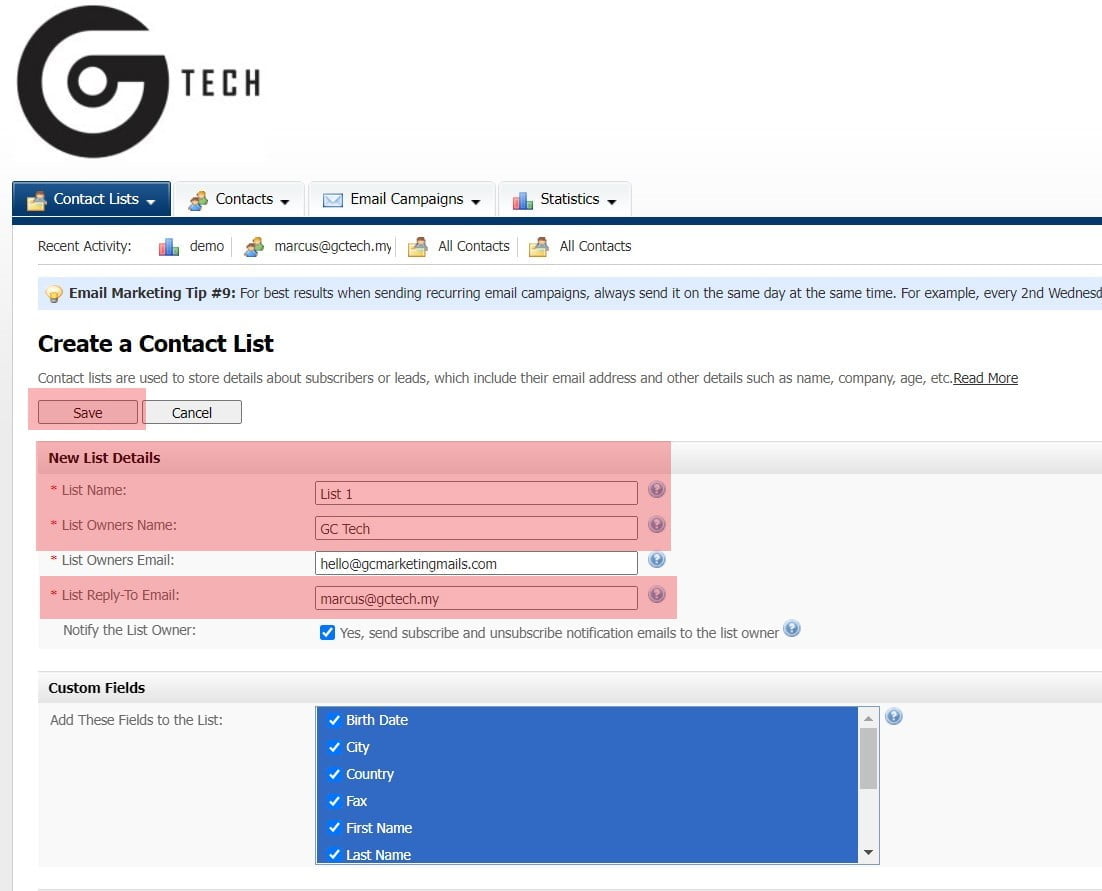
3. Key in List Name, List Owner Name and Change reply to Email.
![how-to-use-gc-emailmarketing-4](https://www.gctech.my/wp-content/uploads/2022/06/how-to-use-gc-emailmarketing-4.jpg)
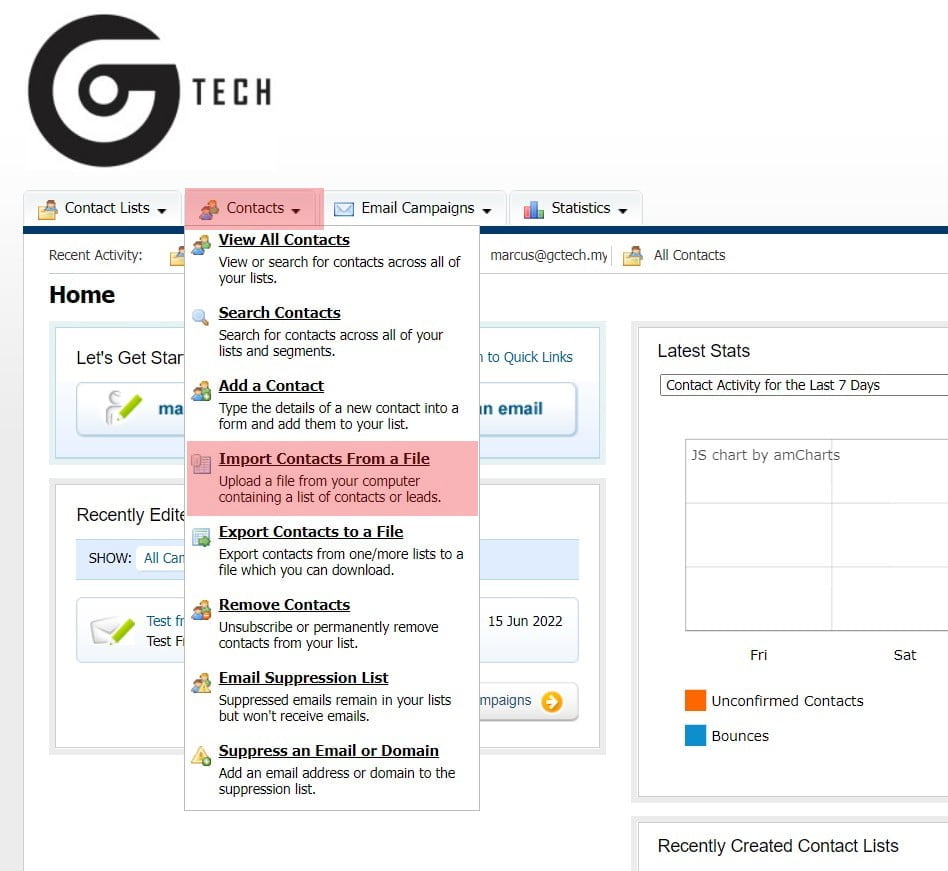
4. Import your Database into Contact List.
![how-to-use-gc-emailmarketing-5](https://www.gctech.my/wp-content/uploads/2022/06/how-to-use-gc-emailmarketing-5.jpg)
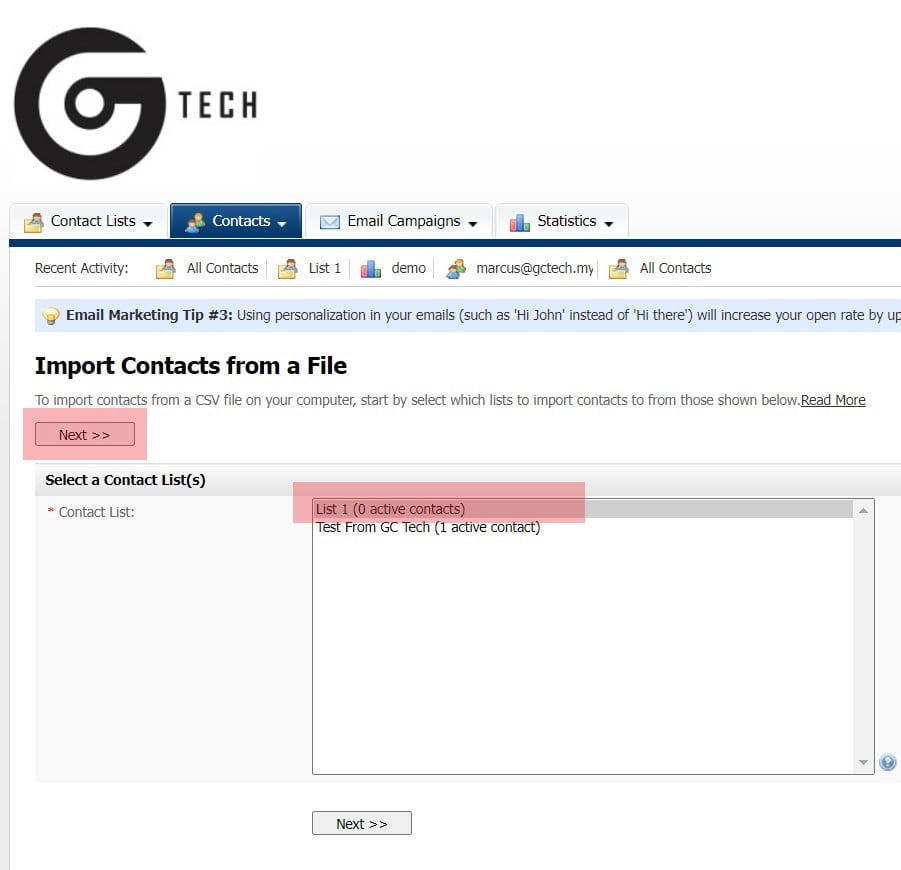
5. Click on the Contact List that you wanted to import your database in.
![how-to-use-gc-emailmarketing-6](https://www.gctech.my/wp-content/uploads/2022/06/how-to-use-gc-emailmarketing-6.jpg)
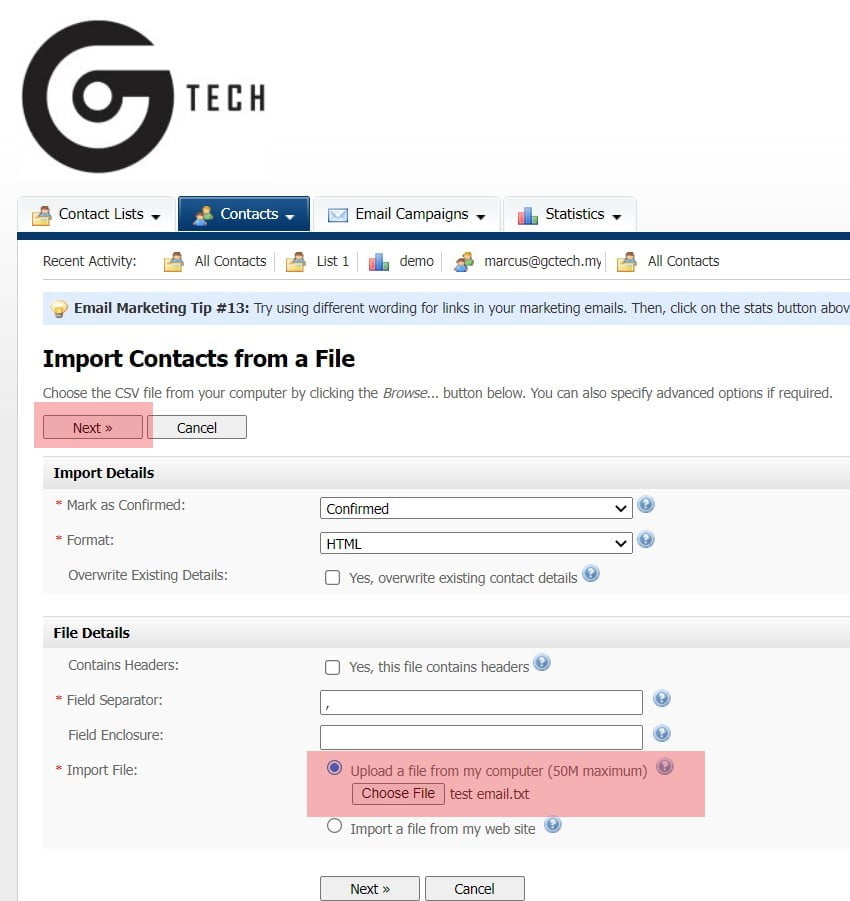
6. I will choose Bulk import email address by using “file”
![how-to-use-gc-emailmarketing-7](https://www.gctech.my/wp-content/uploads/2022/06/how-to-use-gc-emailmarketing-7.jpg)
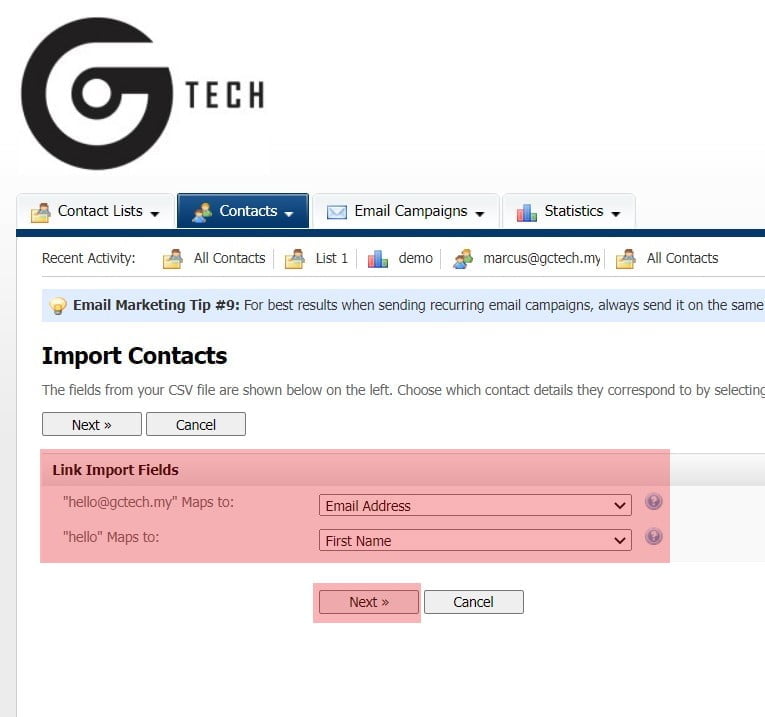
7. Maps the Email to Email, and Name to First Name
![how-to-use-gc-emailmarketing-8](https://www.gctech.my/wp-content/uploads/2022/06/how-to-use-gc-emailmarketing-8.jpg)
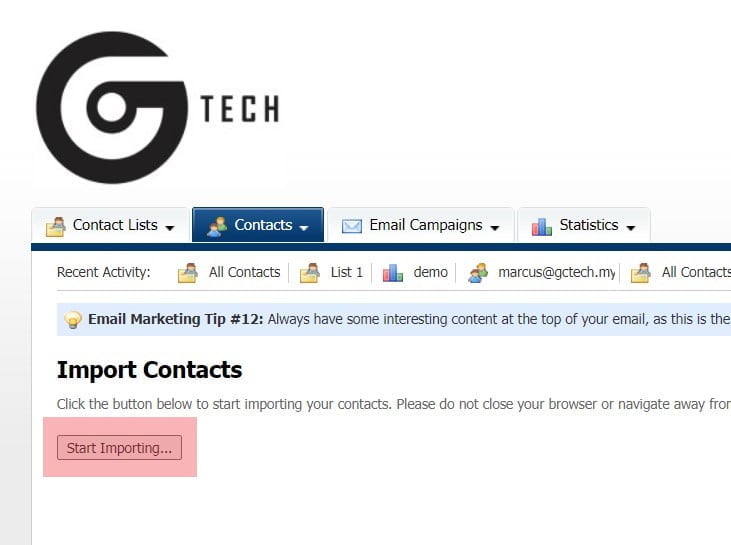
8. Click on Start Import..
![how-to-use-gc-emailmarketing-9](https://www.gctech.my/wp-content/uploads/2022/06/how-to-use-gc-emailmarketing-9.jpg)
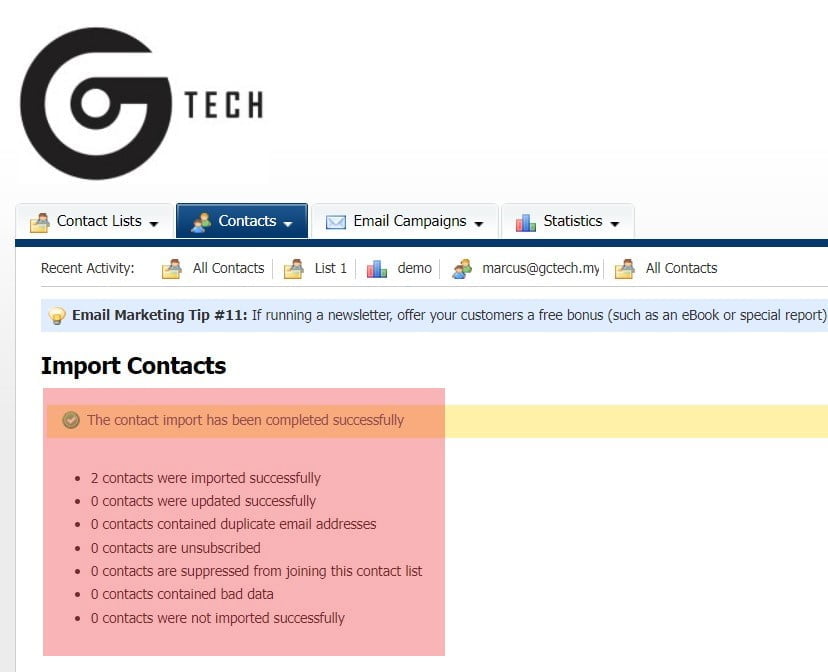
9. Result will show after.
![how-to-use-gc-emailmarketing-10](https://www.gctech.my/wp-content/uploads/2022/06/how-to-use-gc-emailmarketing-10.jpg)
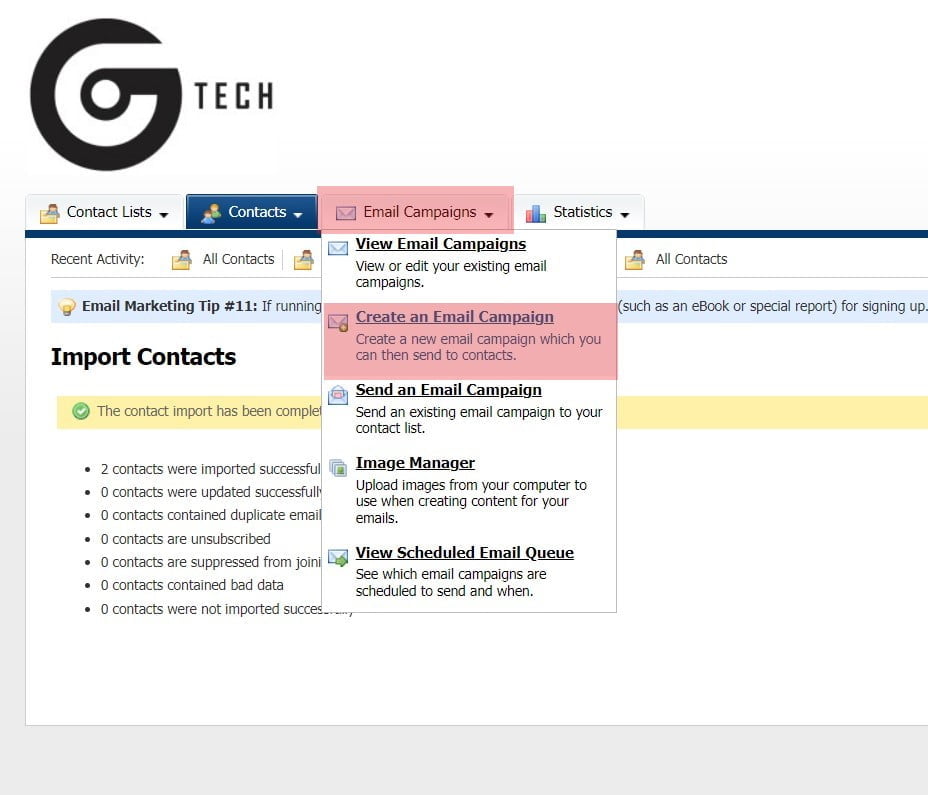
10. Click on Create an Email Campaign to start blasting.
![how-to-use-gc-emailmarketing-11](https://www.gctech.my/wp-content/uploads/2022/06/how-to-use-gc-emailmarketing-11.jpg)
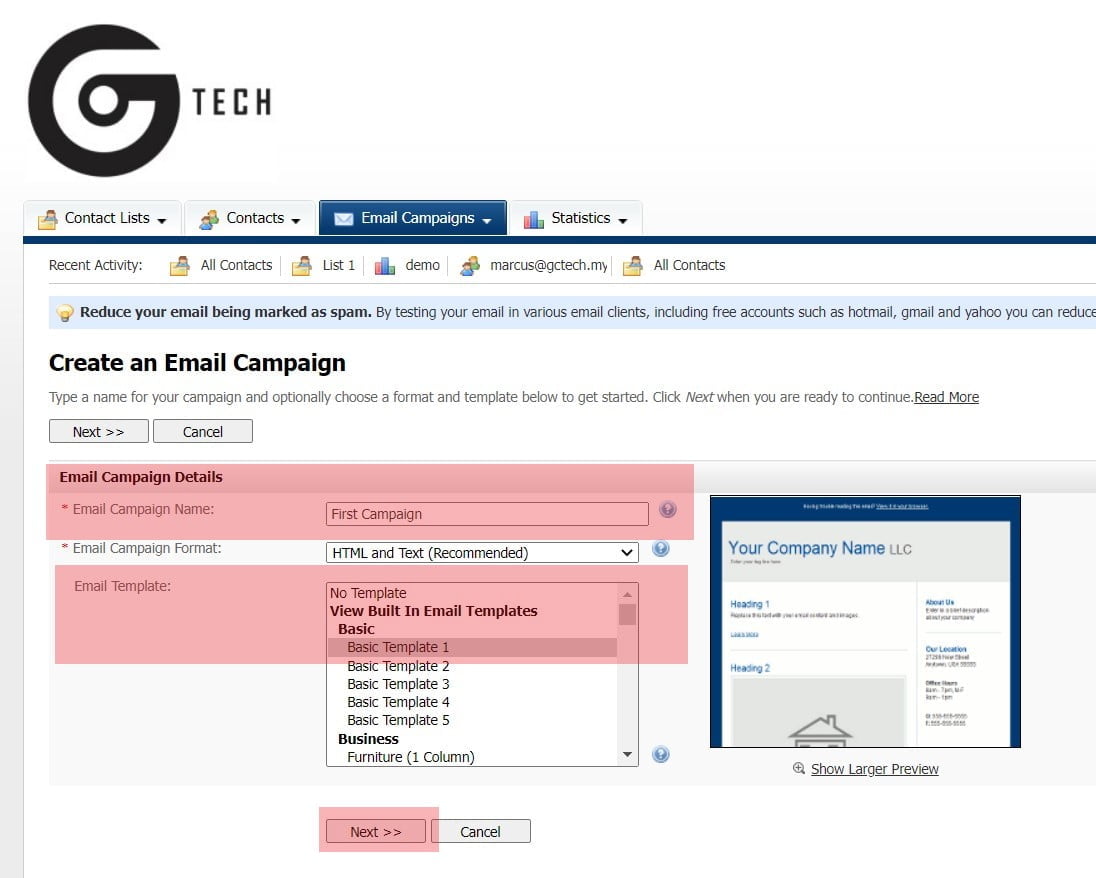
11. Insert Campaign Name for your own reference. For Testing Purpose, I will use the built-in template.
Note : Campaign Name is not Email Subject Title.
![how-to-use-gc-emailmarketing-12](https://www.gctech.my/wp-content/uploads/2022/06/how-to-use-gc-emailmarketing-12.jpg)
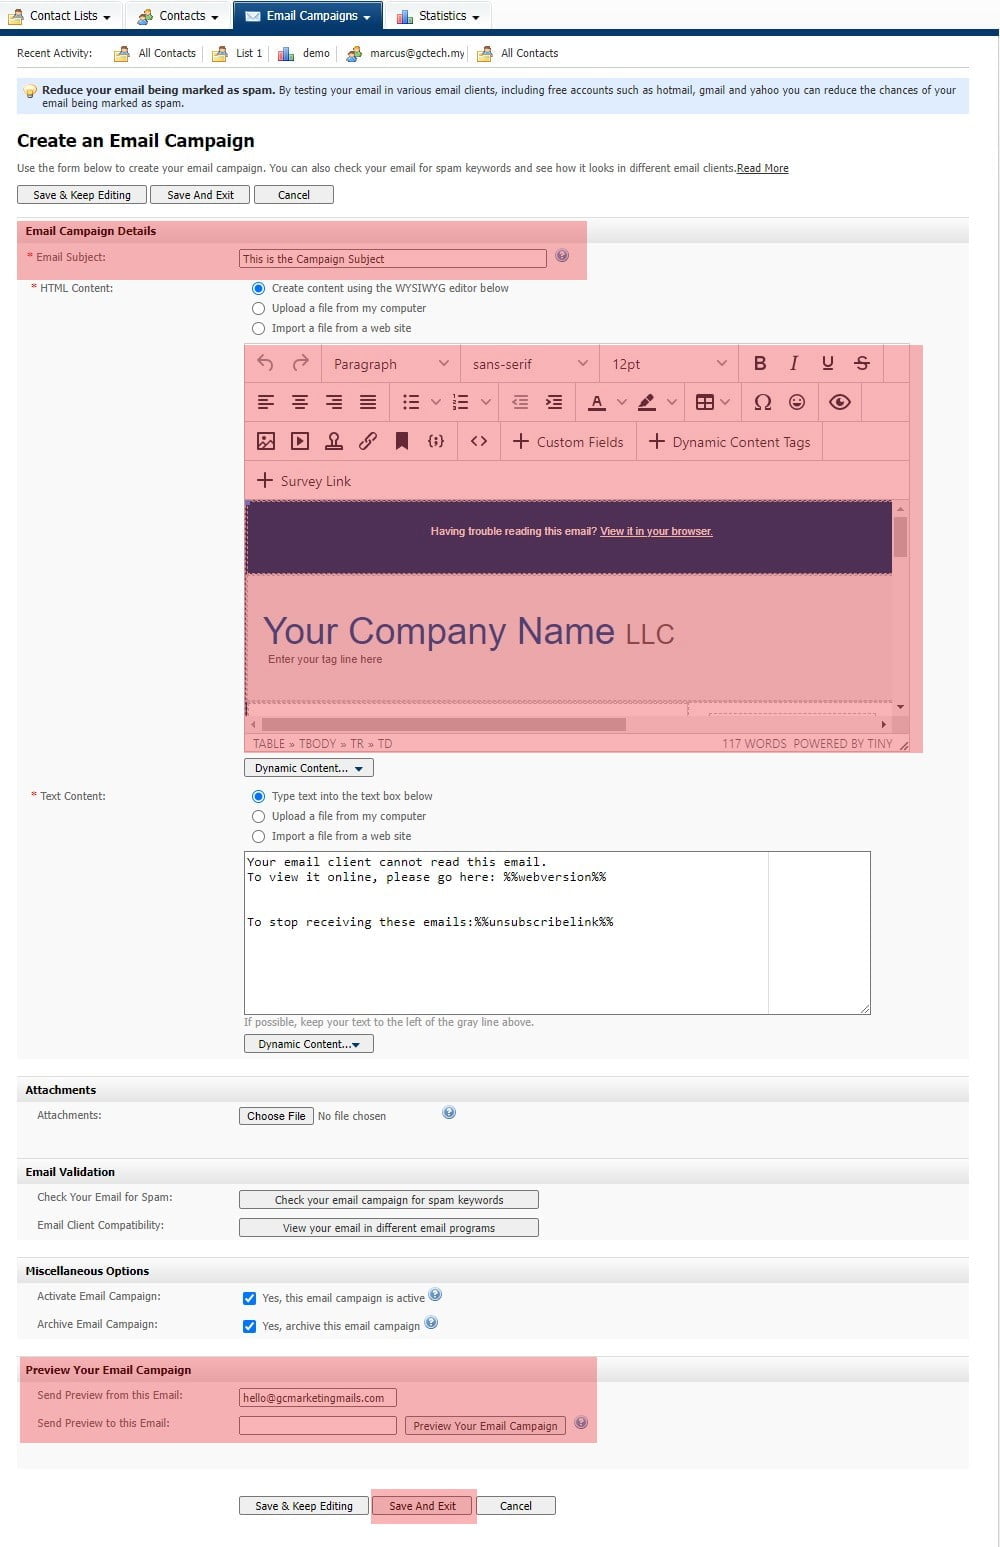
12. Key in Email Subject, Edit campaign, and you also can preview by using preview button at below. If everything is done, you may click on save and exit.
![how-to-use-gc-emailmarketing-13](https://www.gctech.my/wp-content/uploads/2022/06/how-to-use-gc-emailmarketing-13.jpg)
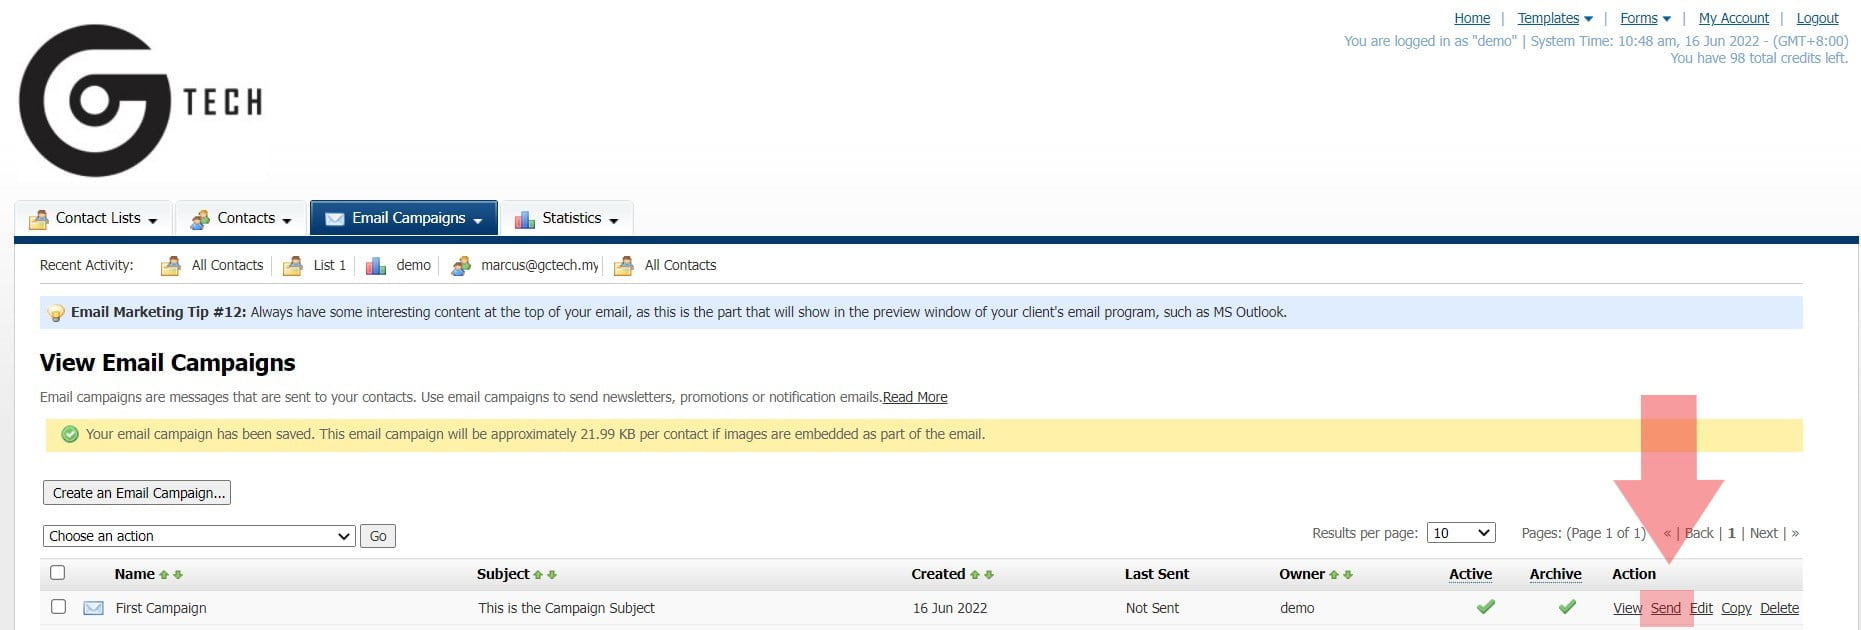
13. Click on Send now.
Note : If reply to information is different with sender information, please untick and key in.
![how-to-use-gc-emailmarketing-14](https://www.gctech.my/wp-content/uploads/2022/06/how-to-use-gc-emailmarketing-14.jpg)
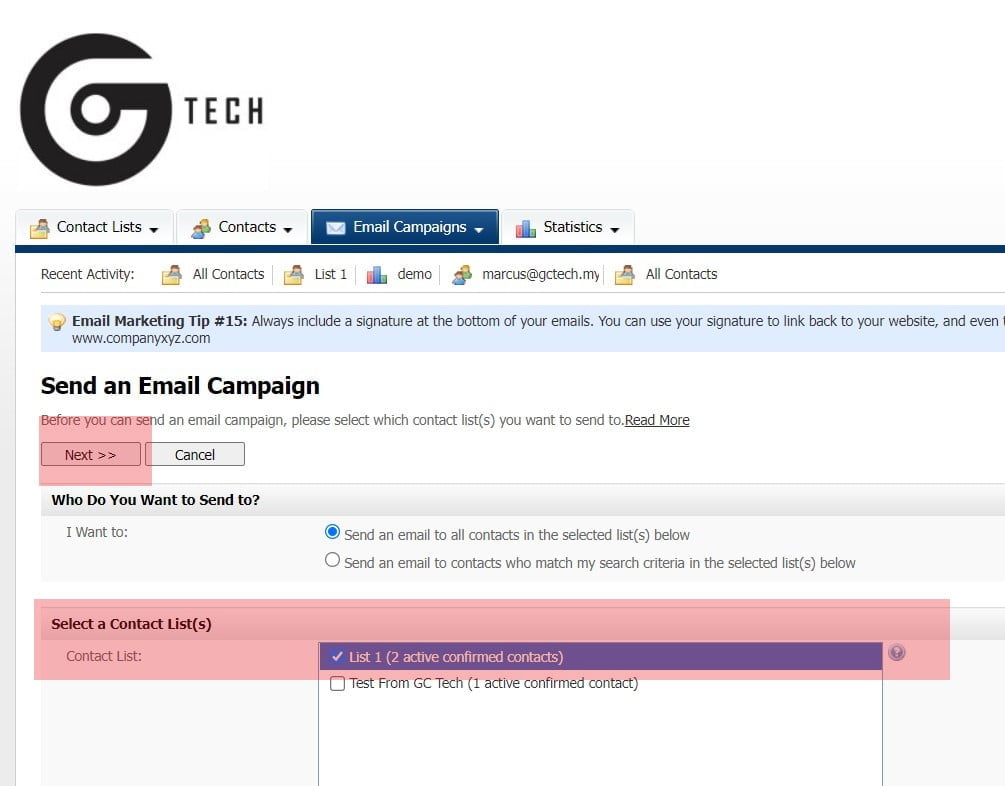
14. Select the List that you wanted to send to, and click next.
![how-to-use-gc-emailmarketing-15-2](https://www.gctech.my/wp-content/uploads/2022/06/how-to-use-gc-emailmarketing-15-2.jpg)
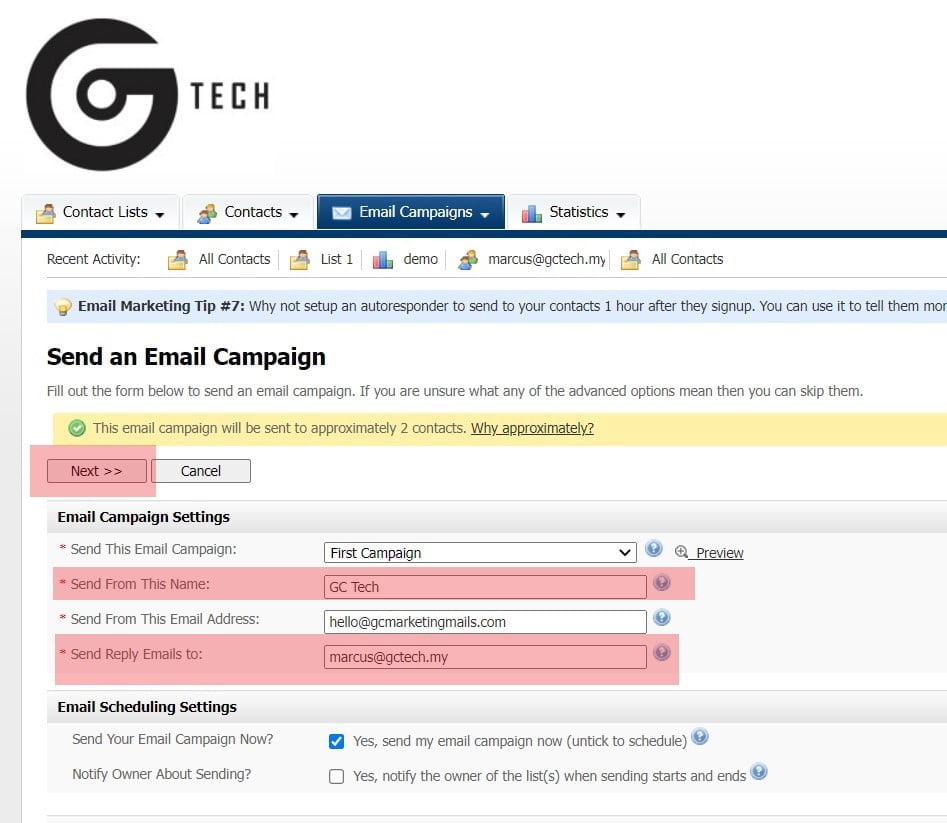
15. Before sending out the campaign, kindly change the reply email and sender name to your desirer email / name.
![how-to-use-gc-emailmarketing-16](https://www.gctech.my/wp-content/uploads/2022/06/how-to-use-gc-emailmarketing-16.jpg)
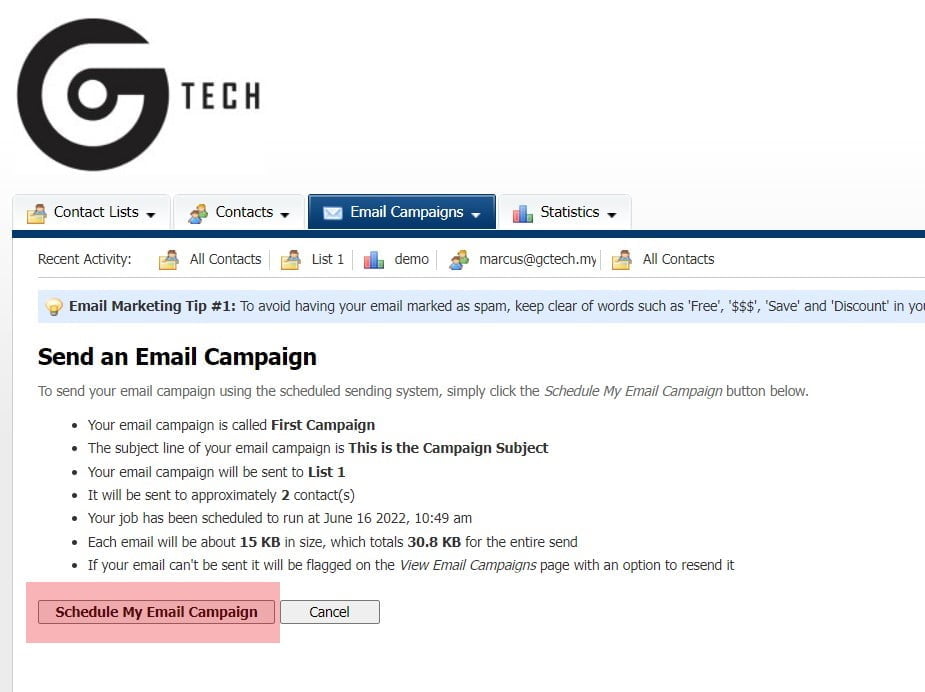
16. Click on schedule my email campaign to blast.
![how-to-use-gc-emailmarketing-17](https://www.gctech.my/wp-content/uploads/2022/06/how-to-use-gc-emailmarketing-17.jpg)
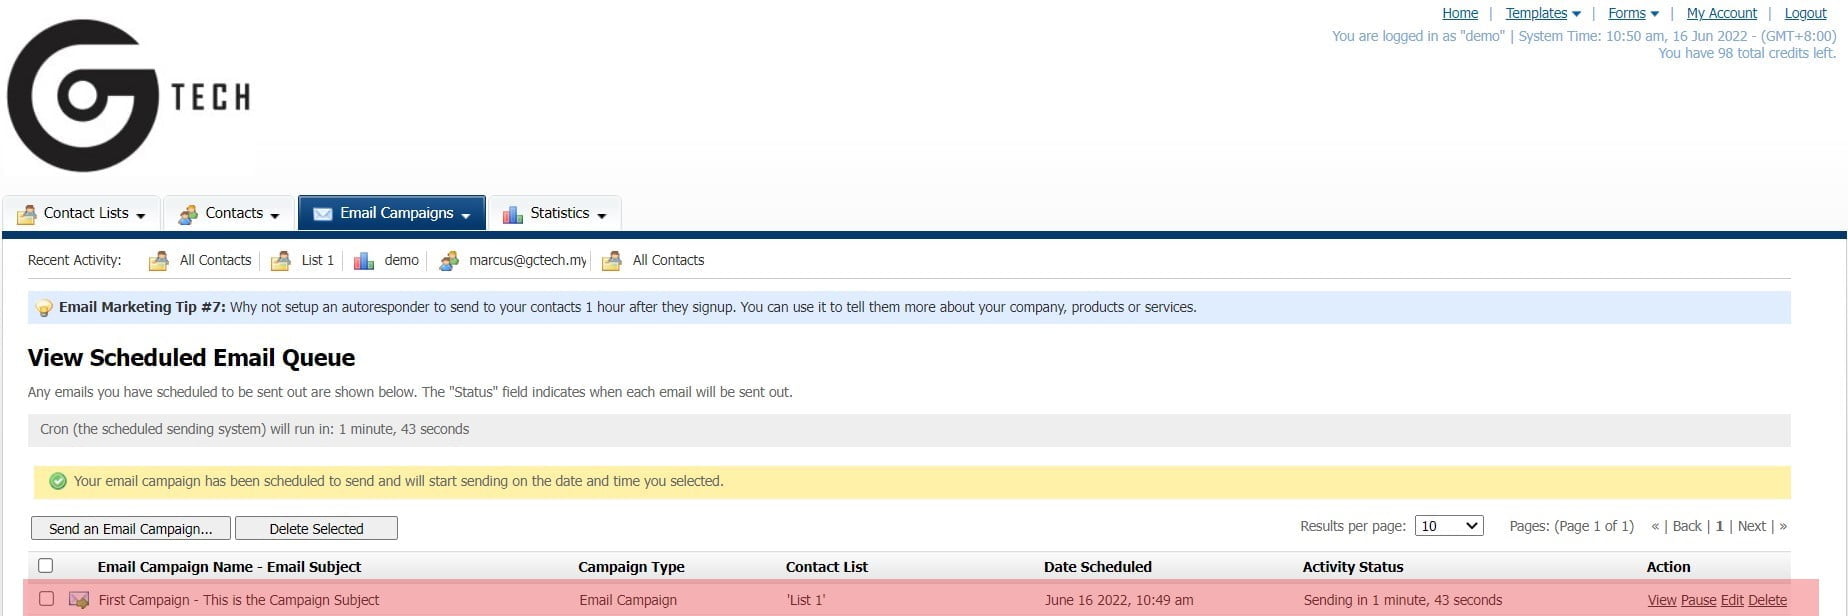
17. Queuing in the Server
![how-to-use-gc-emailmarketing-18](https://www.gctech.my/wp-content/uploads/2022/06/how-to-use-gc-emailmarketing-18.jpg)
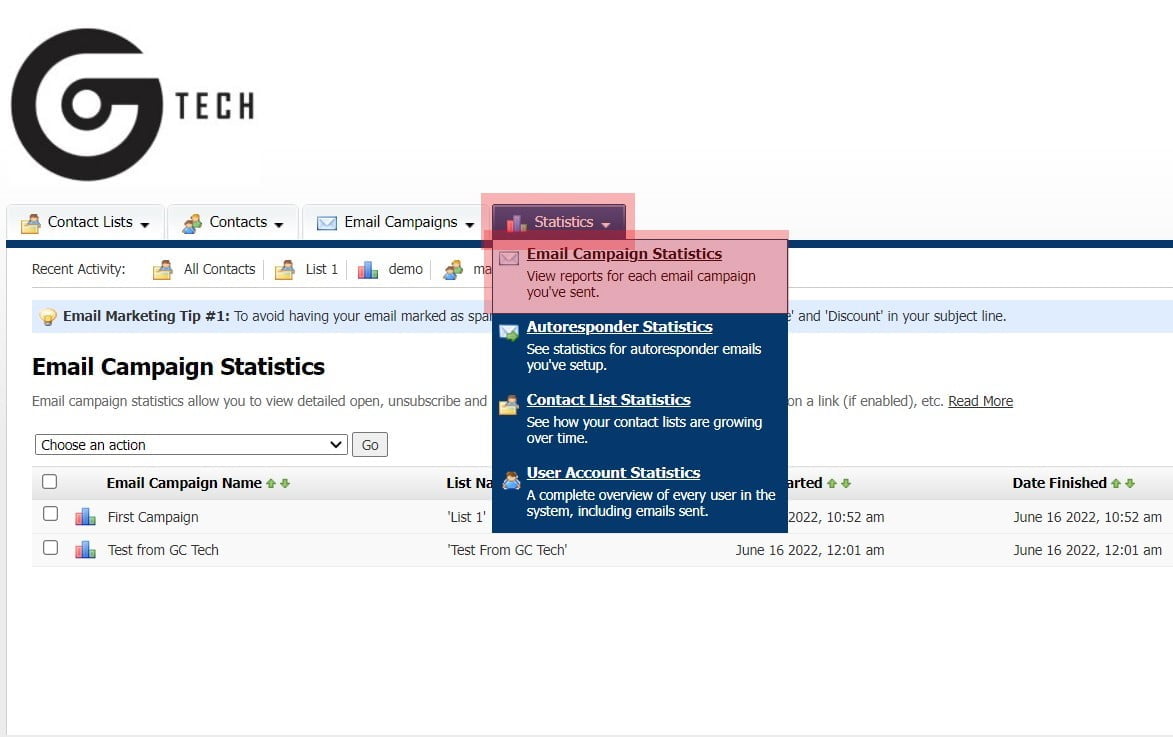
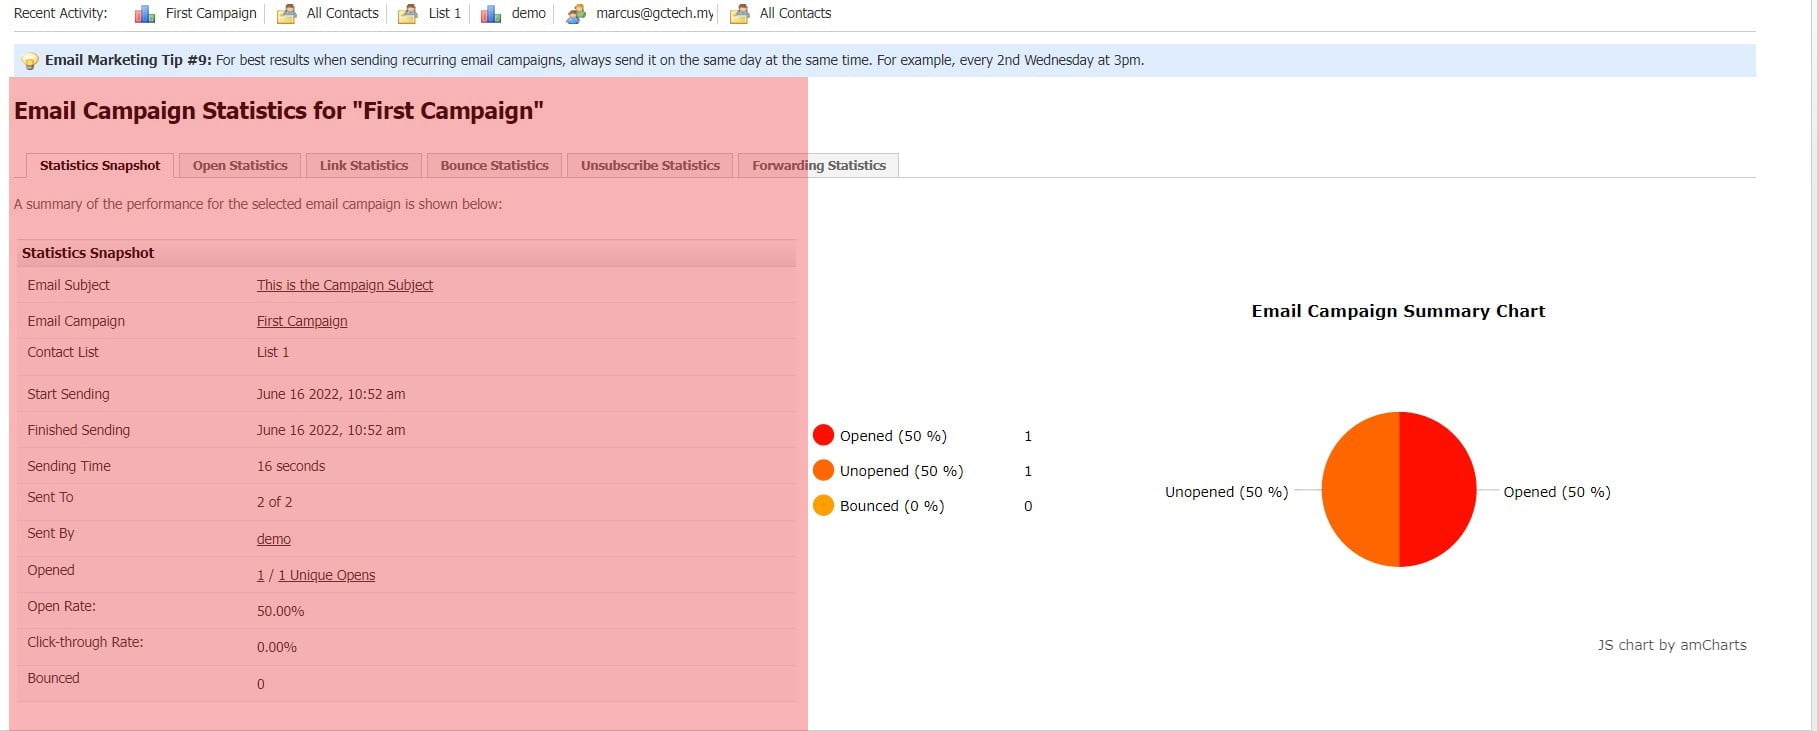
18. Click on Statistics and Email Campaign Statistics for the report.
![how-to-use-gc-emailmarketing-19](https://www.gctech.my/wp-content/uploads/2022/06/how-to-use-gc-emailmarketing-19.jpg)
19. This is how the campaign report shows.